All Domain Extensions: Which One Should You Choose?
04.09.2025
What is Domain Name Status Codes Meaning?
26.11.2025Domain Name Api – Installation and Integration guide
This documentation describes how to integrate your DomainNameAPI account into WHMCS software.
Minimum Requirements
- WHMCS 7.8 or higher
- PHP7.4 or higher (Recommended 8.1)
- PHP SOAPClient plugin must be active.
- Customer T.C. Customfields containing identity information / Tax Number / Tax Office information. (Optional)
Attention!!!
If you are upgrading, back up your old files before installation.
Loading
Put the “modules” folder in the folder you downloaded into the folder where Whmcs is installed. (Example: /home/whmcs/public_html)
Note: Do not discard .gitinore, README.md, LICENSE files.
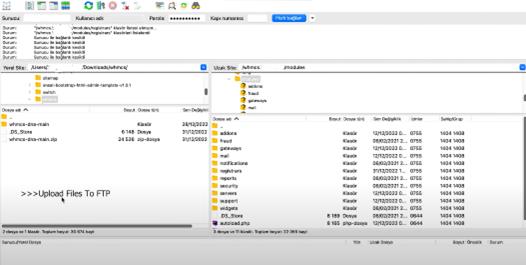
If you misload files, the modules cannot be found by module WHMCS.
Module Configuration
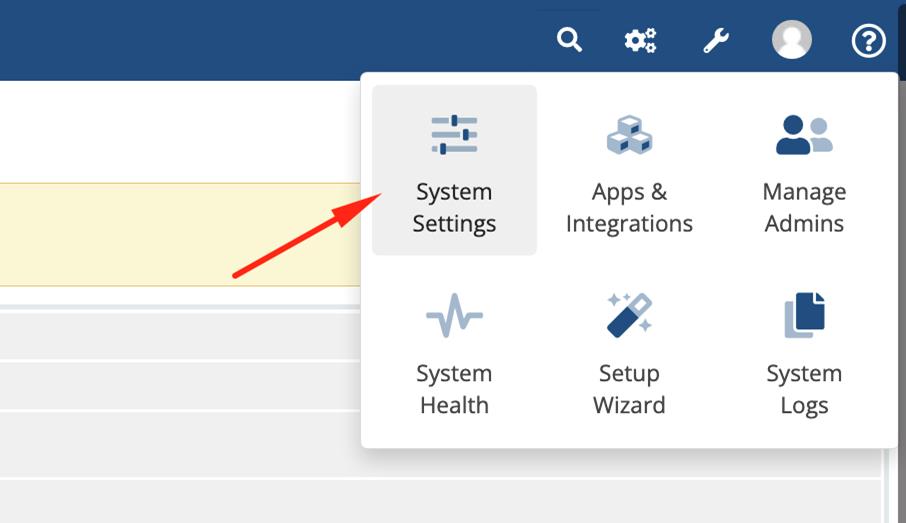
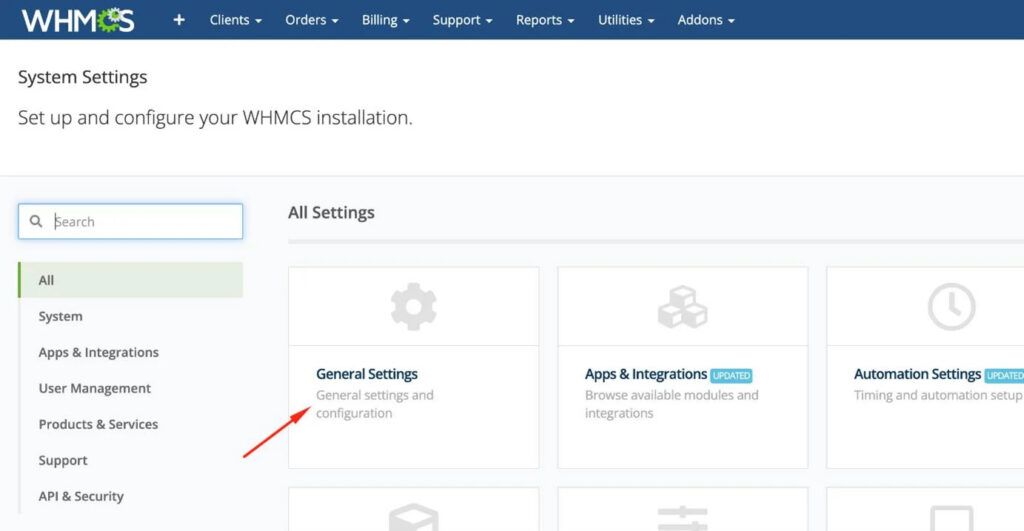
After uploading the files, from the WHMCS administration panel, go to the System Settings Section,
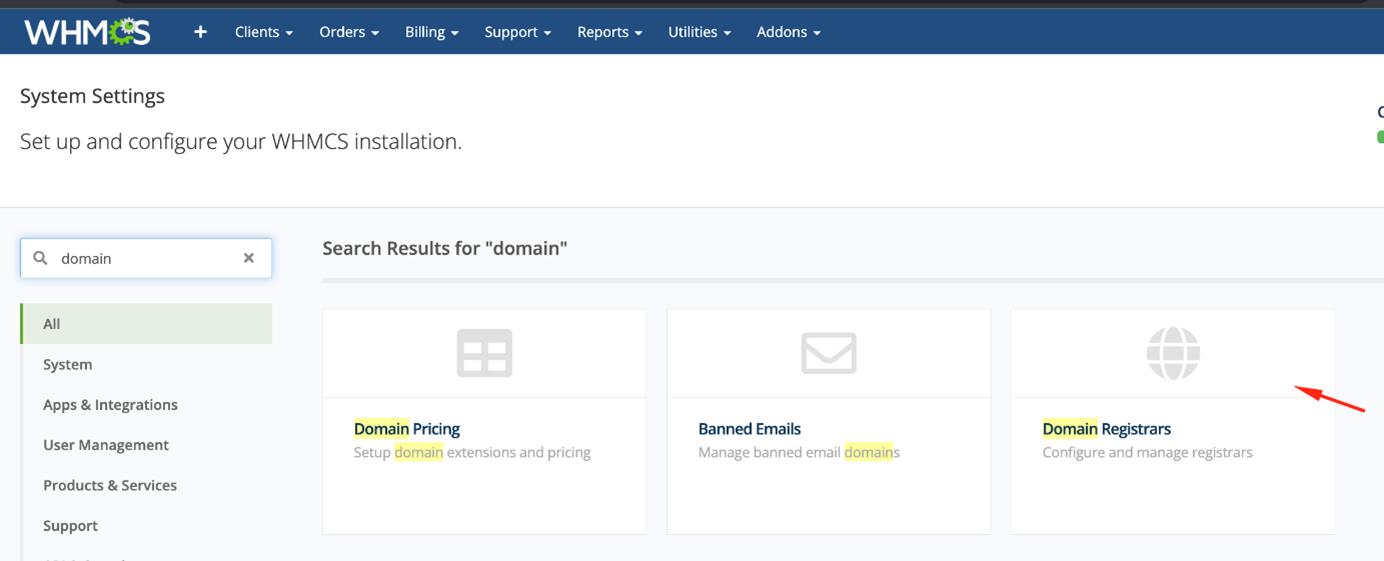
After clicking the System Setting section, come to the Domain Registrar Section,
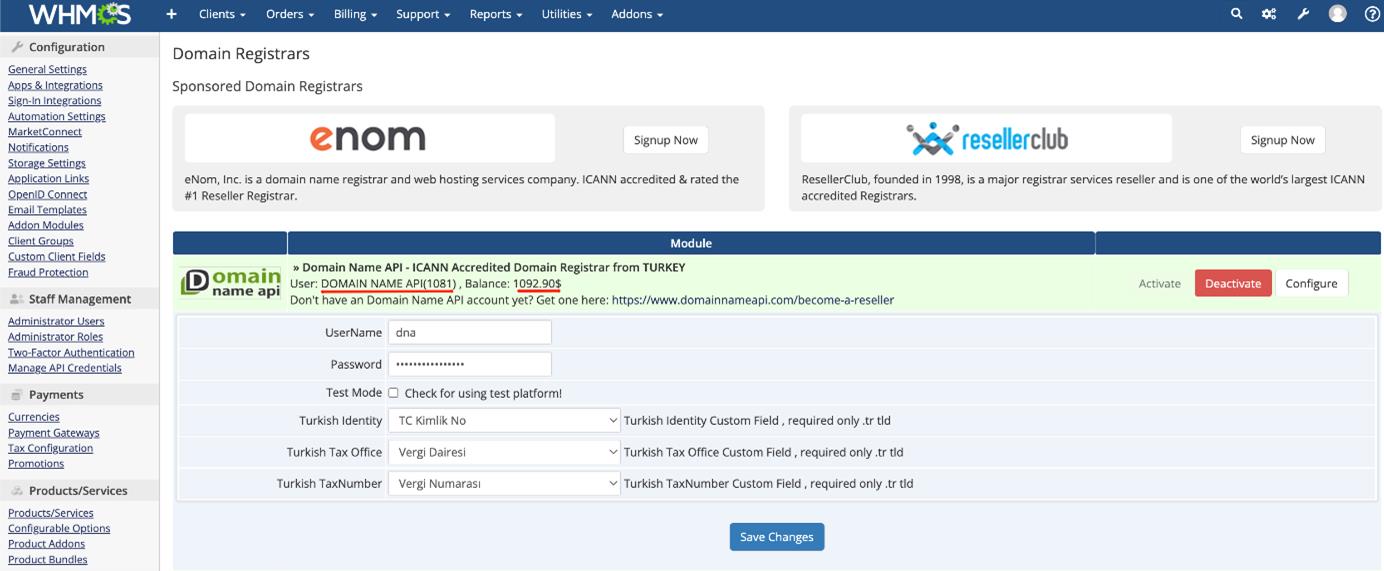
On the page you entered, if you left the module files in the correct folder, “Domain Name API” will appear.
After activating, enter the username and password obtained by us.
After saving, your username and current balance will be visible.
Match the TR Identity Number and Tax Number Information to be used to obtain the .tr domain name of your users, if any, from the settings you have seen.
Domain name pricing settings
After the module settings are configured, navigate to System Settings
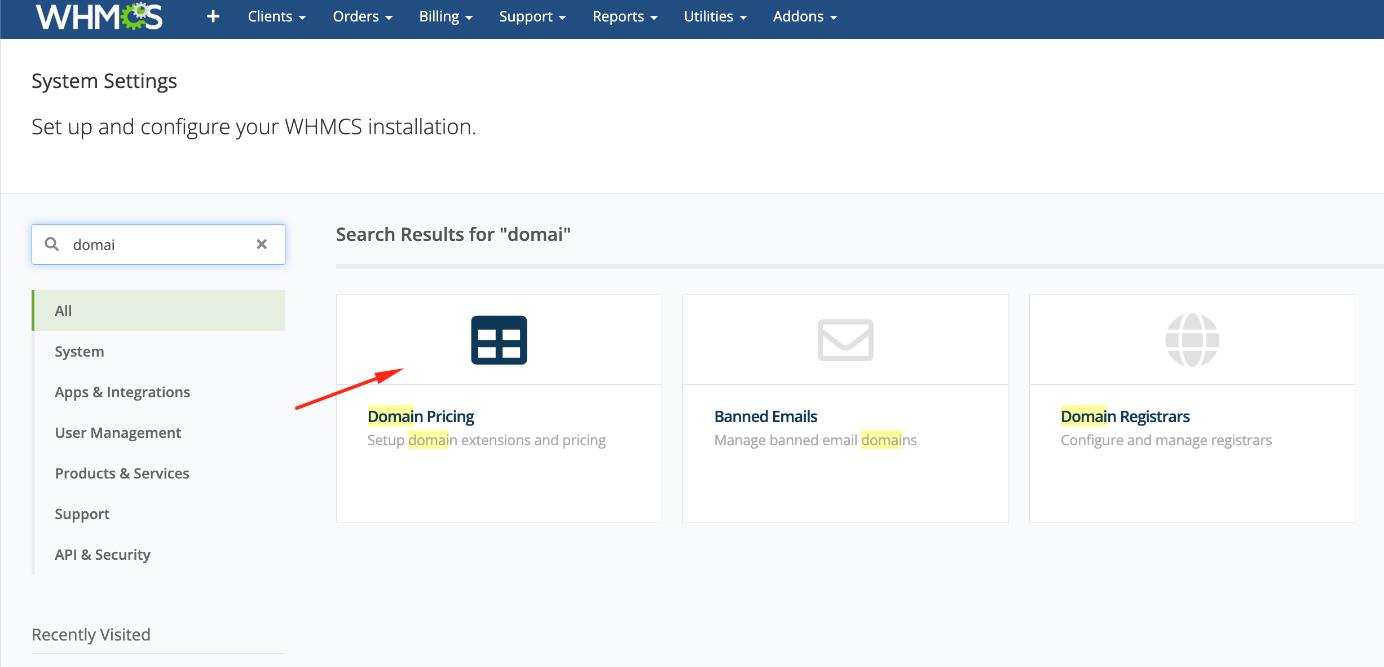
Determine the TLD you want to sell. (Example: .com.tr)
Select “Domain Name API” for auto registration.
Select the EPP code Option.
For pricing, you can enter manually. You can also set a Bulk Price. (will be explained in the next section).
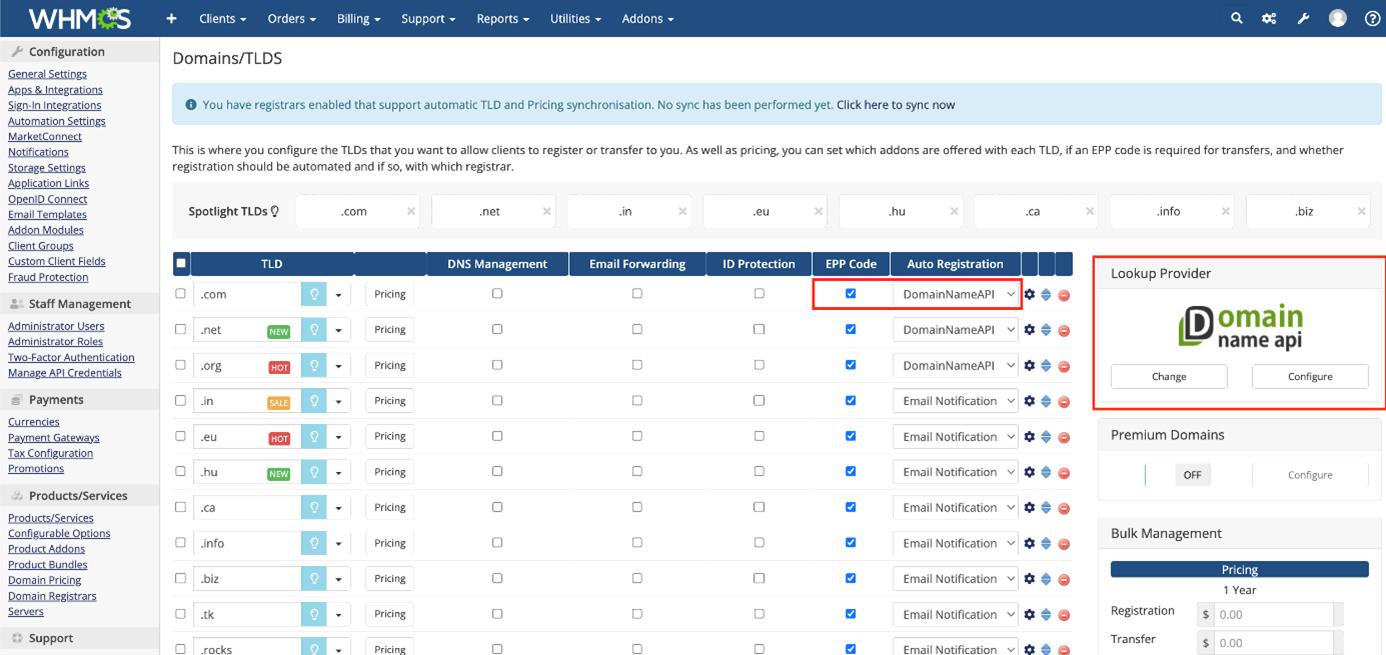
Instead of using public Whois servers as a domain query source, you can use the domainname api. For this, press the “Change” button in the “Lookup provider” section, select the “DomainNameApi” option that appears at the bottom after the domain registry option, then choose which TLDs to use.
Bulk Pricing & Automated Pricing
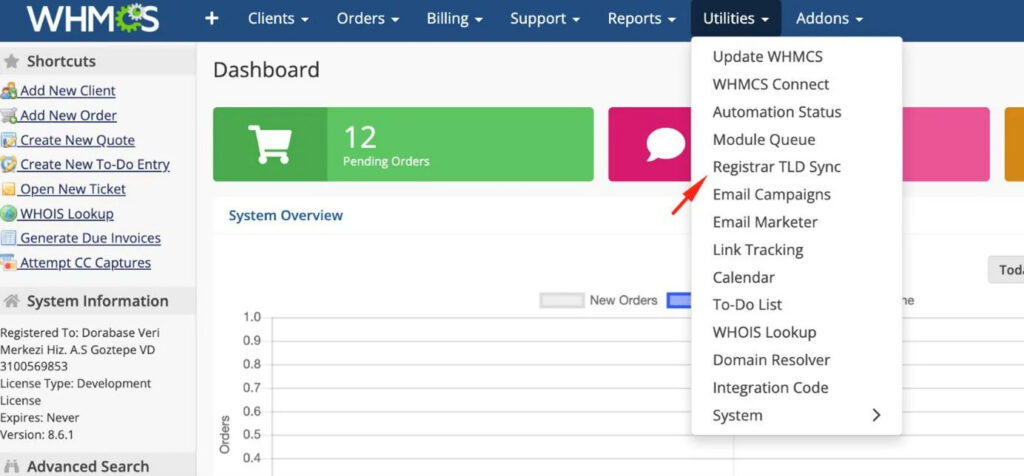
Go to Registrar TLD Sync from Utilities section. Select “DomainNameApi” from the screen that comes up, wait a bit.
On the next screen, all tlds in our system are cross-compared with all tlds on whmcs, profit margin and loss are calculated and displayed in bulk, allowing import.
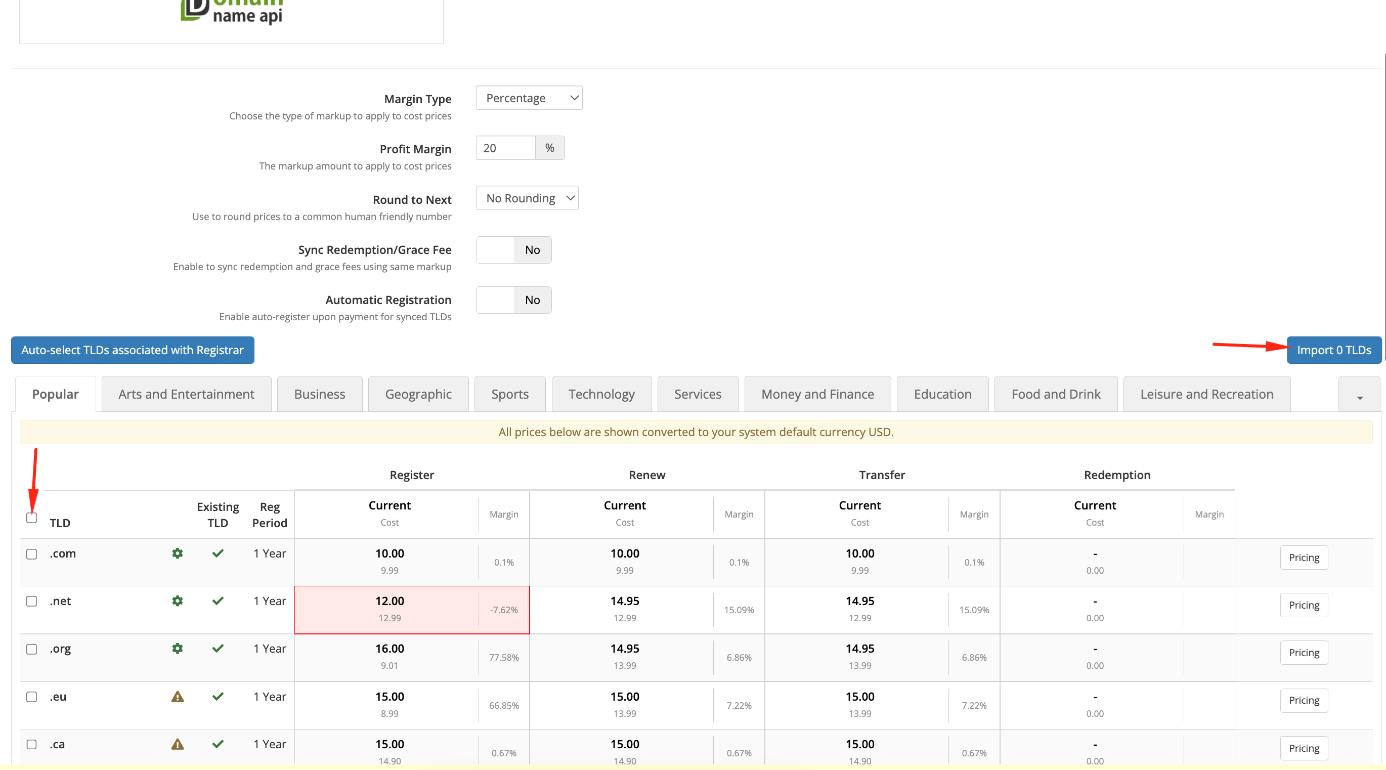
For more information : Whmcs TLD Sync
Manager’s Perspective
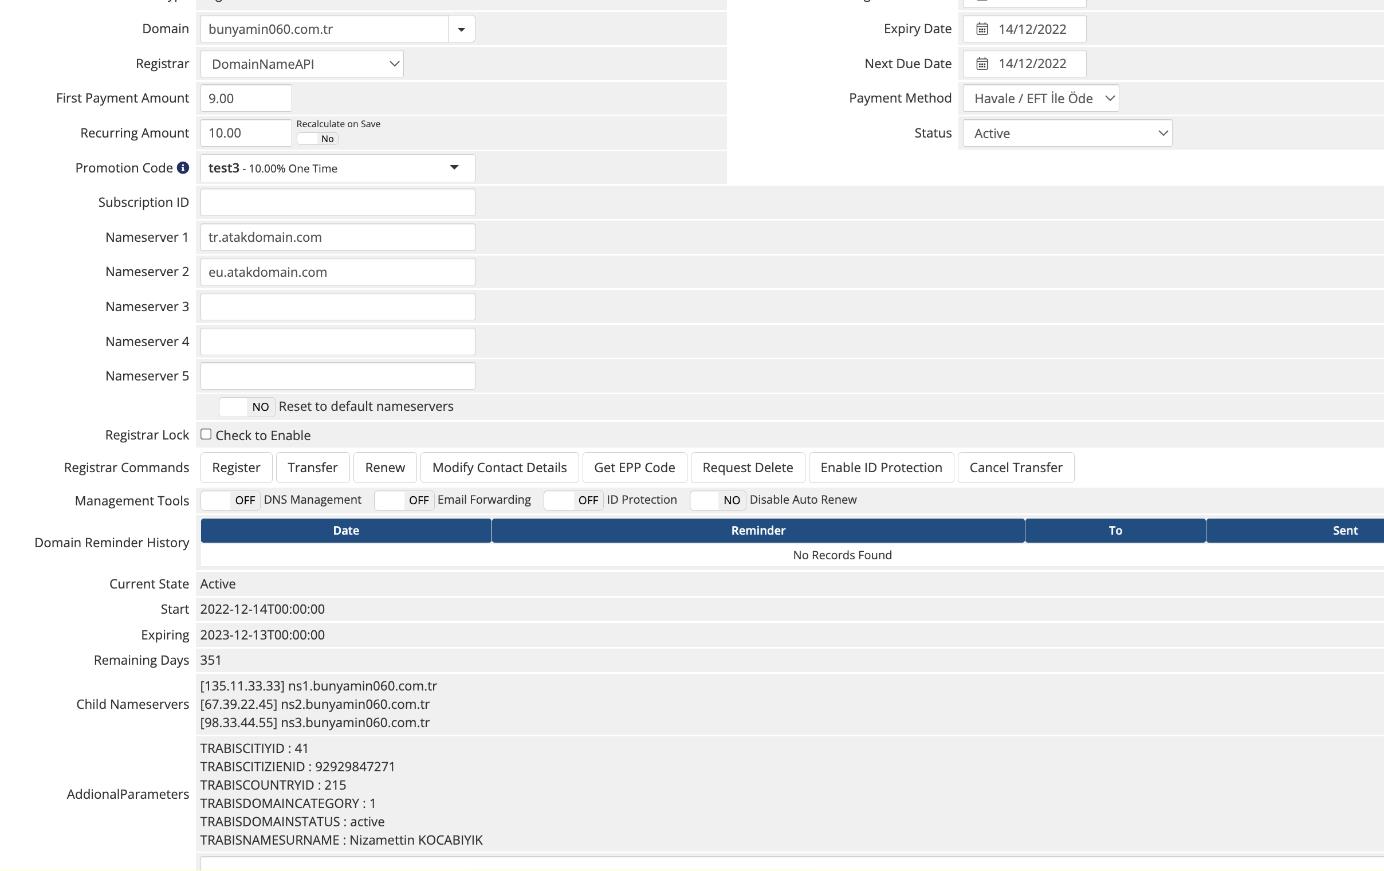
You can send a “Deletion request” for the domain name.
You can send “Transfer Cancellation” for the domain name.
You can see the live status, instant start and end of the domain name
You can list your subs
You can view additional field information
General Settings
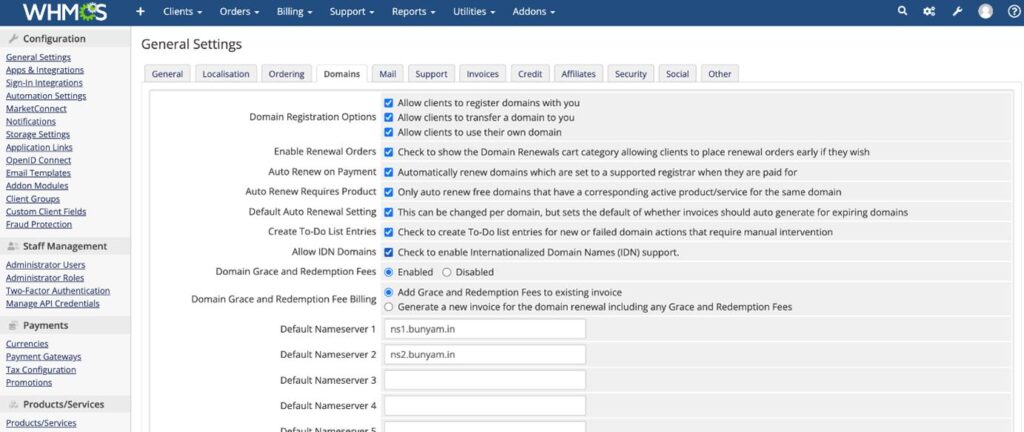
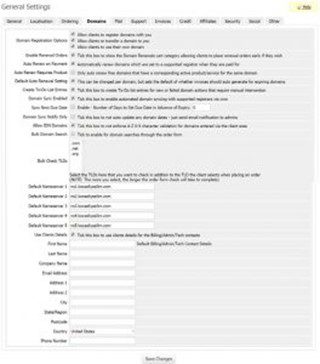
Go to General Settings from System Settings, select the domain tab.
Activate the ‘Allow clients to register domains with you’ option if you want your customers to be able to register domain names themselves.
Activate the ‘Allow clients to transfer a domain to you’ option if you want your customers to be able to transfer the domain name themselves.
Activate the ‘Enable Renewal Orders’ option if you want your customers to be able to renew their domain name before the maturity date.
Activate the ‘Auto Renew on Payment’ option if you want your customers to be reflected in the payment renewal at the same time.
Activate the ‘Domain Sync Enabled’ option if you want the current domain to be checked and synchronized at regular intervals. We recommend enabling this option.
If you want to manage Turkish, Hebrew, Arabic, Russian etc. domain names, activate the ‘Allow IDN Domains’ option.
In the ‘Default Nameserver’ information, enter your nameserver information.
Sync Settings
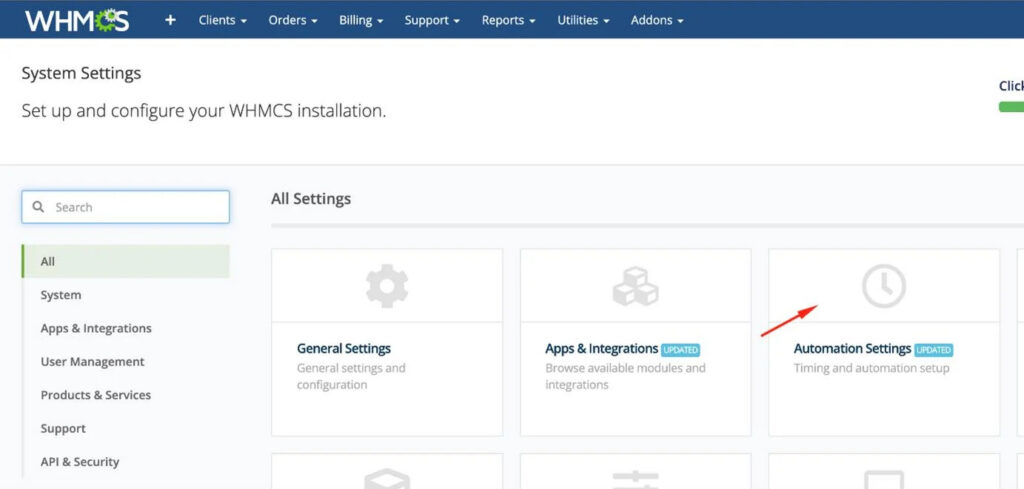
Go to Automation settings from System Settings. Go to the Domain Sync Settings section.
Turn on domain synchronization,
Activate the “Sync Next Due Date” option if you want the end date to be changed in the update.
Adjust other settings according to the intensity of your system.
Error – Detail View
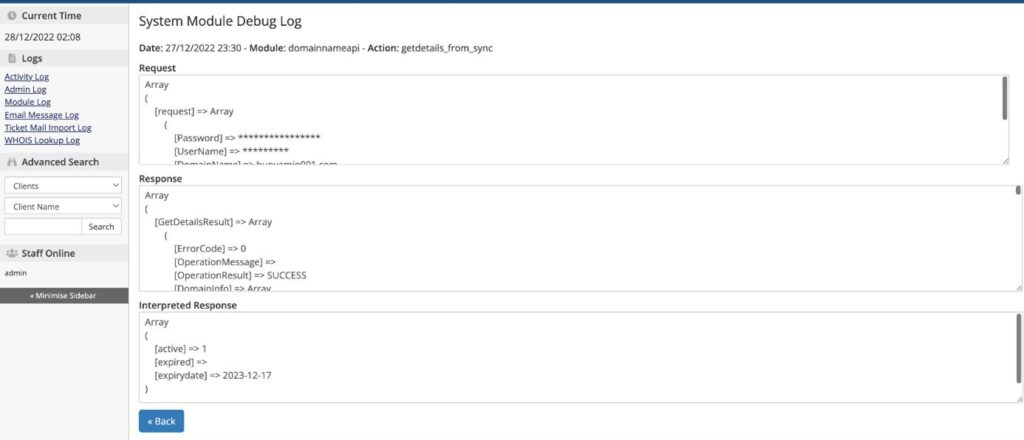
Go to the Module Log section on the right from the System Logs option.
Find the relevant log and click on the date
You can view detailed request, reply and filtered reply.
!! We recommend that the system log is closed for daily use in terms of system performance. For detailed information : Whmcs Logging

Debugging
To activate debugging management, click “Utilities // Logs // Module Log” link.
Activate logging by clicking “Enable Debug Logging” if available as it is shown in the following image. If there is “Disable Debug Logging” button, logging is already active.

All successful/failed requests and responses relating to domain are logged in this module.
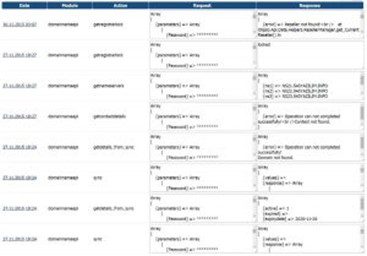
If you think that there is a problem, you can review details by clicking date of the related log.


